Azure AD
Preparation
The following placeholders will be used:
authentik.companyis the FQDN of the authentik install.
Azure setup
Navigate to portal.azure.com, and open the App registration service
Register a new application
Under Supported account types, select whichever account type applies to your use-case.
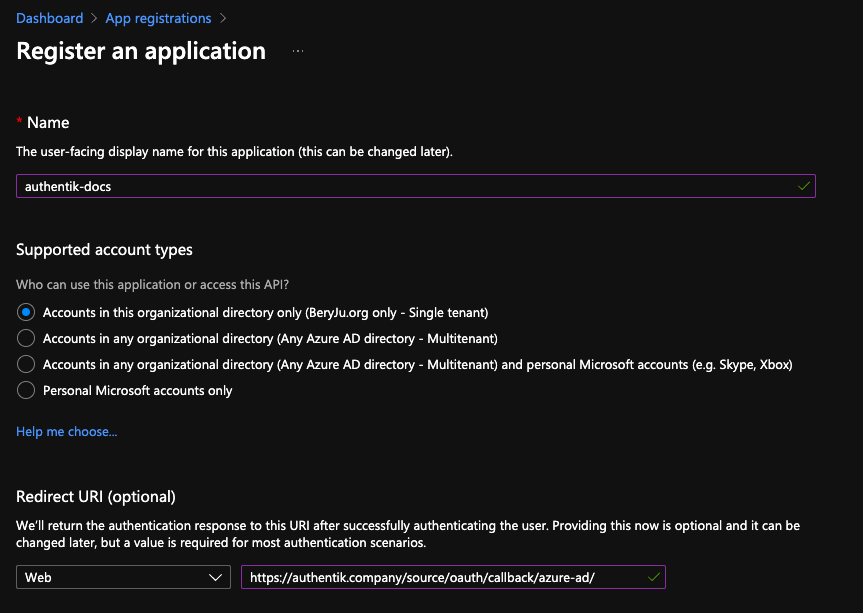
Take note of the Application (client) ID value.
If you selected Single tenant in the Supported account types prompt, also note the Directory (tenant) ID value.
Navigate to Certificates & secrets in the sidebar, and to the Client secrets tab.
Add a new secret, with an identifier of your choice, and select any expiration. Currently the secret in authentik has to be rotated manually or via API, so it is recommended to choose at least 12 months.
Note the secret's value in the Value column.
authentik Setup
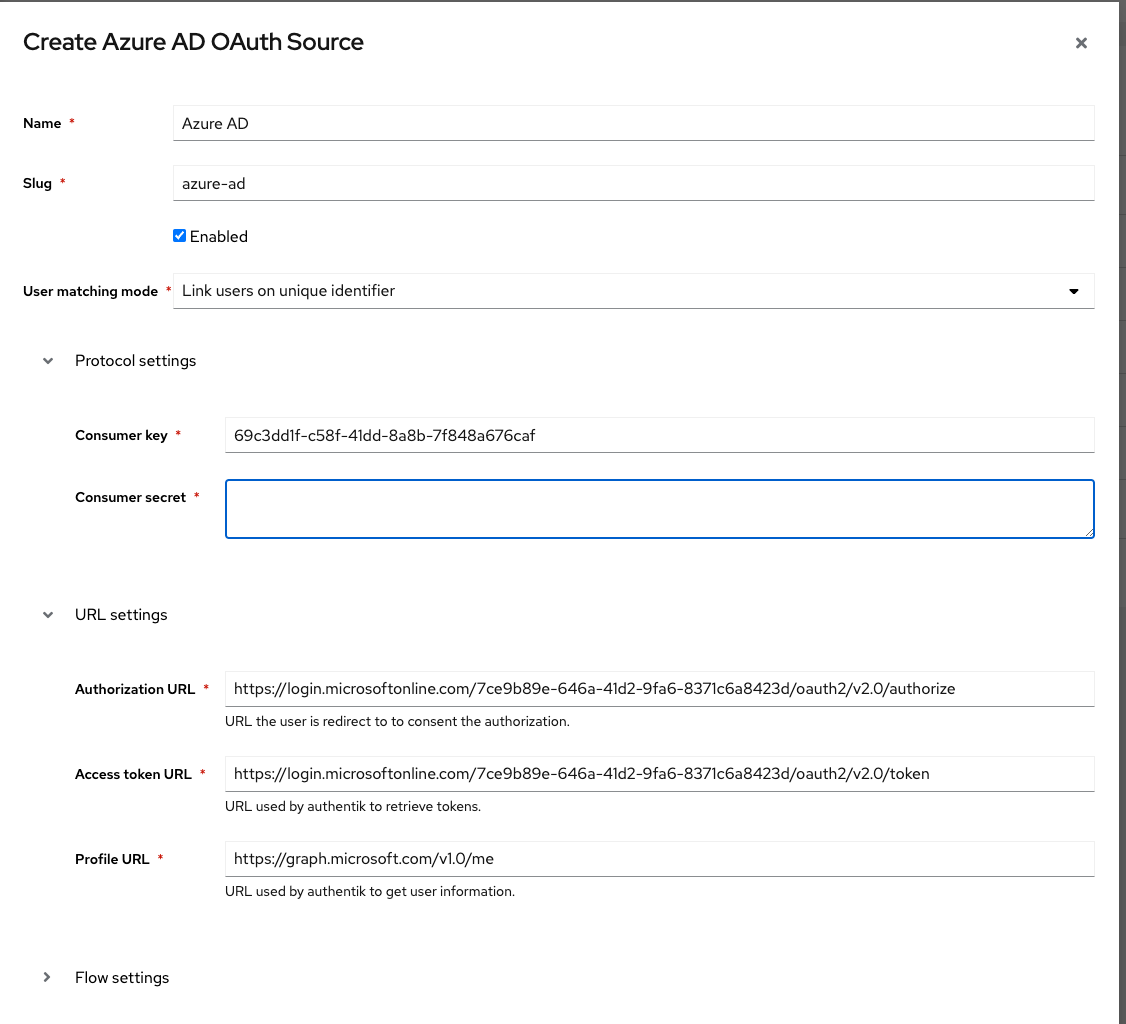
In authentik, create a new Azure AD OAuth Source in Resources -> Sources.
Use the following settings:
- Name:
Azure AD - Slug:
azure-ad(this must match the URL being used above) - Consumer key:
*Application (client) ID* value from above - Consumer secret:
*Value* of the secret from above
If you kept the default Supported account types selection of Single tenant, then you must change the URLs below as well:
- Authorization URL:
https://login.microsoftonline.com/*Directory (tenant) ID* from above/oauth2/v2.0/authorize - Access token URL:
https://login.microsoftonline.com/*Directory (tenant) ID* from above/oauth2/v2.0/token
Save, and you now have Azure AD as a source.
note
For more details on how-to have the new source display on the Login Page see here.